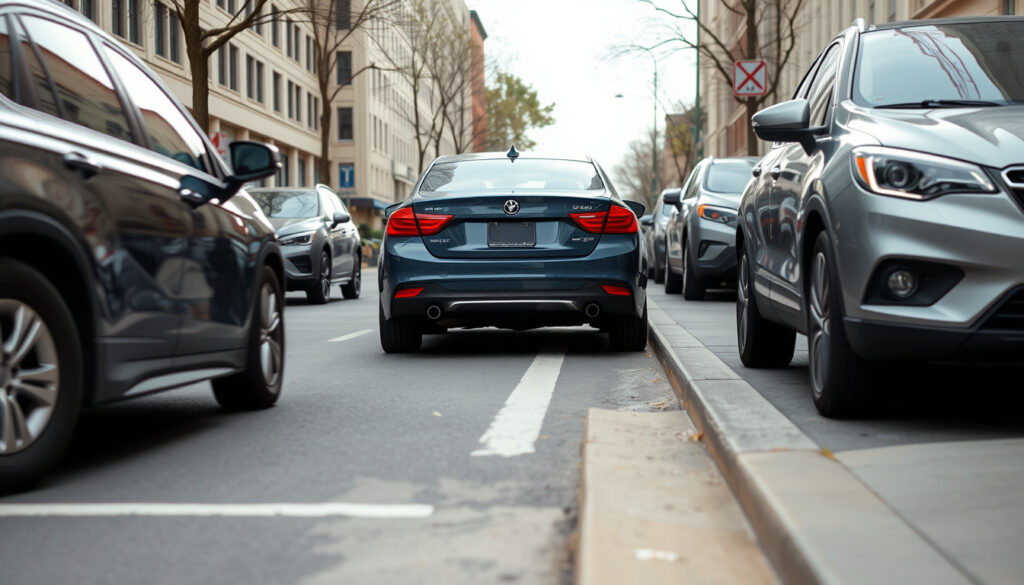
How to Parallel Park: Step-by-Step Guide for Beginners
If parallel parking makes your stomach drop, you’re not alone. The maneuver is often cited as one of the trickiest parts of a driving test, but its logic boils down to a simple spatial puzzle.
Driving test failure rate: 25% · Minimum space requirement: 1.5x vehicle length · Steering adjustments in 1-2-1 method: 3 · Ideal distance from curb: 6–12 inches
Quick snapshot
- Look for a space at least 1.5x your car’s length (Central MA Safety (driver education provider))
- Indicate and pull up alongside the front car (SafeWay Driving (driving school blog))
- Check your rearview mirror and side mirrors (Wawanesa U.S. (insurance company guide))
- Stop when your rear bumper aligns with the front car’s rear axle (Wawanesa U.S.)
- Turn your steering wheel fully to the right (Central MA Safety)
- Begin reversing slowly (SafeWay Driving)
- Reverse until your car is at a 45-degree angle (SafeWay Driving)
- Straighten the wheel and continue reversing (Central MA Safety)
- Turn left to tuck into the space (Wawanesa U.S.)
- Pull forward to center your car (Wawanesa U.S.)
- Ensure you are 6–12 inches from the curb (Central MA Safety)
- Check clearance with front and rear cars (SafeWay Driving)
Five key facts, one pattern: the 1‑2‑1 steering method and a target distance of 6–12 inches from the curb are the two constants across every reputable driving resource.
| Fact | Value |
|---|---|
| Ideal space length | 1.5 x vehicle length |
| Steering motions | 3 (1‑2‑1 method) |
| Distance from curb | 6–12 inches |
| Common mistake | Oversteering early |
| Practice recommendation | Empty parking lot with poles |
New drivers who treat parallel parking as a memorized routine rather than a spatial puzzle often fail the parking portion of the driving test — 25% of test-takers lose points here, according to DMV statistics.
What is the easiest way to parallel park?
Most driving instructors agree that the simplest technique is the 1‑2‑1 method, which breaks the process into three steering moves instead of a continuous guessing game.
The 1‑2‑1 Method Explained
- First turn: one full lock toward the curb (Central MA Safety)
- Second: straighten the wheels (SafeWay Driving)
- Third: one full lock away from the curb (Wawanesa U.S.)
This sequence gives you a repeatable framework. The pattern: each steering motion corresponds to a visual cue — alignment with the front car’s axle, a 45‑degree body angle, and clearing the rear bumper.
Using Reference Points
Instead of estimating, use fixed points on your car. Central MA Safety advises that when your front door mirror lines up with the rear bumper of the car in front, it’s time to start turning. Wawanesa U.S. adds that you should stop backing when the front of your car clears the rear bumper of the vehicle ahead.
Common Mistakes to Avoid
- Oversteering early, which throws off the angle (SafeWay Driving)
- Rushing the reverse phase (Central MA Safety)
- Ignoring the side mirrors (Wawanesa U.S.)
The implication: smooth, slow steering with clear visual anchors eliminates most guesswork and reduces the chance of hitting the curb.
A driver who masters the 1‑2‑1 method can park in spaces as tight as 1.5 times the vehicle’s length — the same gap that SafeWay Driving uses in its cone-based practice setup — without needing to creep forward and back multiple times.
What is the 1 2 1 method of parallel parking?
If you’ve heard driving instructors mention “1‑2‑1,” it refers to the three distinct steering positions that form the skeleton of modern parallel parking.
- Position and Reverse: Pull up parallel to the car ahead, leaving about one vehicle width of gap. Turn the wheel fully toward the curb and start reversing slowly.
- Straighten and Adjust: When your car reaches roughly a 45-degree angle, straighten the wheel. Continue reversing until your side mirror aligns with the front car’s rear bumper.
- Final Forward Correction: Turn the wheel fully away from the curb and guide the front of your car into the space. Pull forward to center the vehicle.
Step 1: Position and Reverse
Pull up parallel to the car ahead, leaving about one vehicle width of gap. After checking your surroundings, turn the wheel fully toward the curb and start reversing slowly. SafeWay Driving calls this the “signal, mirror, over-the-shoulder, and glance and go” (SMOG) safety check before moving.
Step 2: Straighten and Adjust
When the body of your car reaches roughly a 45‑degree angle to the curb, straighten the wheel. Continue reversing until you see the front car’s rear bumper or your side mirror aligns with that bumper. Wawanesa U.S. recommends stopping at this point and checking the curb distance.
Step 3: Final Forward Correction
Turn the wheel fully away from the curb and guide the front of your car into the space. Central MA Safety notes that the final two‑foot forward adjustment centers the vehicle and leaves you within the 6‑ to 12‑inch curb zone.
The catch: the 1‑2‑1 method works best when you maintain a constant, slow speed of about 2–3 mph throughout — any faster and you’ll overshoot the cues.
How do I know if I’m too close to a car?
Judging distance is the most common source of anxiety for beginner drivers. Three visual checks remove the guesswork.
Using Your Side Mirrors
SafeWay Driving explains that your side mirror should show the rear bumper of the car behind you when you’re at the correct distance. Wawanesa U.S. adds that if you can’t see the other car’s headlights in your mirror, you’re too close.
Reference Points on Your Vehicle
Most cars have a natural reference: the bottom edge of your rear windshield or the rear door handle. When that reference aligns with the curb, you’re approximately 6–12 inches away. Central MA Safety suggests practicing in a lot with traffic cones first to calibrate your own car’s specific points.
When to Stop Reversing
Wawanesa U.S. says you should stop backing once the front of your car has cleared the rear bumper of the car in front. If you continue reversing after that point, you risk hitting the car behind or extending too far past the curb.
The pattern: three distinct visual checks — curb in mirror, bumper clearance, and side‑mirror alignment — replace subjective “feeling” with objective stops.
Why am I struggling to parallel park?
Struggling is normal, and the reasons fall into a few repeated categories.
Lack of Spatial Awareness
SafeWay Driving notes that many learners misjudge the distance because they rely on front‑seat memory rather than mirror checks. Spatial awareness improves when you force yourself to look at the side mirrors every few seconds.
Steering Overcorrection
The most common mistake, according to Central MA Safety, is turning the wheel too far or too quickly during the first reversing stage. Overcorrection leads to a car that’s angled too steeply, forcing a multi‑point adjustment.
Anxiety and Practice
Wawanesa U.S. advises practicing in a low‑traffic area, such as an empty parking lot, using temporary markers (like cones) set 26 feet apart — the same spacing Safeway Driving uses for training. With repetition, the anxiety fades and the sequence becomes automatic.
What this means: parallel parking feels hard because it combines spatial reasoning, steering coordination, and mirror‑reading simultaneously — but each skill can be isolated and practiced separately.
What is the hardest thing to learn in driving?
Ask any driving instructor, and parallel parking almost always tops the list. The reason is that it demands simultaneous execution of multiple sub‑skills.
Spatial Coordination
Central MA Safety emphasizes that the driver must coordinate steering direction, mirror perspective, and distance to the curb — all while reversing. This triple demand is unlike the sequential nature of forward driving.
Vehicle Size Perception
SafeWay Driving points out that different vehicles have different overhangs and wheelbases, making the same set of reference points slightly unreliable from car to car. An SUV will need a wider gap and earlier steering than a compact sedan.
Multi-Step Execution
Wawanesa U.S. states that even experienced drivers sometimes need a second attempt when the space is tight. The pressure of a real street with traffic behind you multiplies the difficulty.
The trade‑off: mastering parallel parking in a controlled environment with cones first isolates the motor‑skill component, then transferring to real spaces reduces anxiety and the risk of error.
Clarity check
Confirmed facts
- 1‑2‑1 method is standard (Central MA Safety)
- Use side mirrors to gauge distance (SafeWay Driving)
- Leave space of 6–12 inches from curb (Wawanesa U.S.)
What’s unclear
- Optimal reference points vary by car model
- Exact steering timing depends on space size
- Ideal space length may vary between 1.5x and 6 feet longer than car (SafeWay Driving vs Wawanesa U.S.)
“Continue to reverse carefully until the vehicle is in the space, using mirrors to avoid contact with the curb or surrounding vehicles.”
Central MA Safety
“The SMOG check — signal, mirror, over-the-shoulder, and glance and go — is a safety habit that should be part of every parallel parking attempt.”
SafeWay Driving
“Center the vehicle between the cars in front and behind, leaving one to two feet or more if possible.”
Wawanesa U.S.
Parallel parking is a skill that rewards deliberate practice over brute repetition. The drivers who succeed are those who treat each attempt as a mini-experiment: adjust the reference point, note the outcome, and try again. For new drivers preparing for their test, the choice is clear: practice the 1‑2‑1 method in low-stakes settings until it feels automatic, or risk failing the parking portion of the exam.
For those struggling with the technique, a step-by-step parallel parking guide offers clear instructions.
Frequently asked questions
Do I need to use my side mirrors when parallel parking?
Yes. Your side mirrors are essential for gauging distance to the curb and to other vehicles. SafeWay Driving includes a mirror check in its SMOG routine, and Wawanesa U.S. recommends using them to see the rear bumper of the car behind you.
What should I do if I hit the curb while parallel parking?
If you hit the curb, pull forward a few feet and adjust your angle. Central MA Safety advises that a gentle contact is acceptable, but if you hear a scraping sound, you’re too close and should reposition.
Can I parallel park an automatic car differently?
No, the steering sequence and visual cues are identical for automatic and manual cars. The only difference is that you’ll keep your left foot off the clutch in an automatic — Wawanesa U.S. notes that the gear type does not affect the technique.
Is parallel parking harder in a large SUV or truck?
Yes, larger vehicles have longer overhangs and wider turning radii. SafeWay Driving suggests leaving an extra foot of space and starting the steering sequence slightly later than you would in a sedan.
How long does it take to learn parallel parking?
Most drivers need about 6–10 practice sessions of 10 minutes each to feel confident. Central MA Safety recommends practicing in an empty lot first to build muscle memory before moving to real streets.
Should I practice parallel parking in an empty lot first?
Absolutely. Wawanesa U.S. and SafeWay Driving both recommend using cones set 26 feet apart to simulate two vehicles, with one cone about 7 feet from the curb and the other about 4 feet from the curb. This setup lets you master the 1‑2‑1 method without real traffic pressure.
Related reading
More related posts
 Liver Cancer Doctor Singapore: Top Specialists & Hospitals
 Park Jin-joo Biography: Age, Husband, Movies & FAQs (2025)
 1 Singapore Dollar to INR Today: Rate & Salary Guide
 Okinawan Diner Nirai-Kanai: Menu, Prices, Reviews in Great World
 ยื่นภาษี 2568: 2025 Deadlines, Forms & Online Guide
 Loh Kean Yew Singapore Open – Results, Rankings and Updates
 MinSuiZen Raku Omakase Teppanyaki: Guide & Reviews
 Hari Raya Haji 2025 Singapore: Date, Public Holiday & Meaning
